


Adjusting to High-DPI Scaling
Scott Hanselman has a great blog post about how life on a high-DPI computer can be painful. A couple of weeks ago, I upgraded to a high-DPI laptop (the Samsung Ativ Book 9 Plus). It has a 3200 x 1800 native resolution, which has 278% of the pixel-area of my previous full-HD screen, but in only 13 inches compared to the 15 inches of my older model.
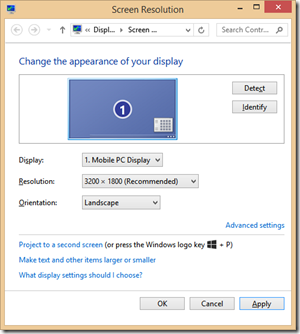
Needless to say, on my new laptop, it’s very important to turn on DPI-scaling to make things readable on this monitor. For those not familiar with DPI-scaling, it proportionally adjusts the size of elements on the screen without giving up any of the screen’s resolution. In other words, it makes things bigger without making them fuzzier. I’m happy to say that Windows 8.1 has some great improvements in this area.
The Problem – Remote Desktop
In this blog post, my intention is not to show you how to use DPI-scaling in Windows, but to let you know about a solution I found to one of the more annoying issues I’ve discovered so far with using DPI-scaling:Remote Desktop is not DPI scaling-aware. After I scaled my screen down to full-HD (a simulated 1920 x 1080 starting at 3200 x 1800 at 167% scaling), I opened a remote desktop session to a server I help maintain and immediately noted that it was displayed at my monitor’s full native resolution. It was ignoring my scaling settings, which made everything almost impossible to read.
The Solution – Remote Desktop Connection Manager
Fortunately, I discovered a utility from Microsoft called Remote Desktop Connection Manager which is meant to provide sysadmins with an easier way to manage multiple servers in one place, such as server farms or a computer lab environment. Fortunately for us, it also is aware of Window’s DPI-scaling APIs, so it respects your scaling settings.
To set it up, follow these steps:
- Download Remote Desktop Connection Manager and install it.
- Once it’s installed, run it
- Select File > New…
- Name your server group something like “MyGroup.rdg”
- Accept the default file location by clicking Save
- Right-click on the server group in the left pane and select Add server…
- Give it an actual server name on your network (or the internet) and give it a display name. Optionally, also specify the logon credentials you’d like to use on the Logon Credentials tab
- Most importantly, though, on the Remote Desktop Settings tab, uncheck Inherits from parent and select Full Screen for the Remote Desktop Size.
- Click Add to add the server to your server group.
- You new server now displays as a node under the server group in the left pane. Double click the server node to connect (or right-click on it and selectConnect server)
- From the Session menu, select Full screen (or right-click on the server name and select Full screen)
Notice that you are now connected to your remote machine and that the remote machine’s screen resolution is respecting your scaling settings.
Enjoy!